Wednesday, 25 February 2015

Maintenance Update (damper, tubes, rods, painting, blowdown, tender)

Thursday 19th
Email from Clive re. last report: "Sorry, can't take the credit for the primer on the roof as it was Eleanor our new volunteer - she also assisted with the polishing."

Sorry, Eleanor! [Not that she receives our news, but maybe Clive can pass it on!]


Collected wire brushes (rotary, to fit drill) and new needles, and took them to Todders.  Stu was there, painting rail chairs for me!  I fitted new needles into the needle gun and threw away the old ones - no point in keeping them, as their heads are so worn that it isn't long before they hurtle out of the gun like a lance, on a mission of their own …

Stu had touched up the number on the front buffer beam.  We both had a butcher's at the footprints on my lovely new red rear buffers.  It went through my mind to re-paint & apply a notice: "This red paint is made from blood.  To avoid the next coat being made from your blood, please keep off it!"

Saturday 21st
2807 was over the pit, which gave me an opportunity to finish off playing with the left-hand (front) damper operating lever. There is some adjustment on the rod that runs from beneath the cab to the damper door.  As the complaint had been that it was hard to raise the lever and thence close the door, I had lengthened the adjustment.  However, that made things worse … because the long rod was trying to push the door further open than was easy to achieve.  So, today I shortened the rod … and the lever can now be easily operated.

Bruce was still trying to make time to design the route for the pipe from the new blow-down valve. While observing the gaps between rods, pipes, stretchers and damper levers through which the 2" diameter pipe might pass, I happened to spot that the newly modified sanding rod was just clipping the steam heat pipe when sanding gear was being turn on/off.  So, I removed the rod, and John & I assisted Bruce in applying a bit of force in a suitable spot, sufficient to keep the rod away from the steam heating pipe.

I had headed for the smokebox, armed with nuts, bolts & washers, to secure the petticoat. However, Jonathan [Loco Dept] had perversely volunteered to test a new "flue-brush" that was intended to run through flue tubes and clean their sides.  This it did, but as the length (up to 15 ft) is achieved by screwing rods together as the brush goes in, a side effect became apparent.  The brush could only be turned clockwise, else the rods might come apart inside the tubes - which would be fun then to get out!  But in turning this way, it was tightening all of the joins between rods … to the point where Jonathan couldn't undo the rods again when he pulled them out!


Dixie climbed up and painted the cab roof.  This had been patched and now needed an overall coat of matt black. Once seen with a brush in your hand, you get diverted to painting anything else that needs it … in Dixie's case this was the brake rigging. I believe he also helped Jonathan, who was struggling a bit with this flue brush idea!


The brake rigging consumed most of Gil's day, plus much of John's and some of Ingo's. Gil & Ingo ended up helping Bruce with the blow-down pipe, while John whiled away some time cleaning grease-covered GWR rail chairs, and also emptied our rubbish bin (a select few of us attend to the domestic necessities!).


Yes, Bruce finally found time to sort out a path for the blow-down pipe. He began with a thin wire, attempting to fashion it into a suitable shape that avoids the obstacles twixt valve and pit.


This was not 100% effective, so we ended up "sacrificing" one of the copper pipes that we had used to unblock tubes last week.  This being 22mm OD, at least it was more realistic than thin wire!  This task then occupied Bruce (plus Gil for a while) under the loco, and me & Ingo in the cab. It was a case of test and bend … test and bend … until we reached a shape that seems to fit the bill.


Ingo had re-fitted the cab AWS warning bell, and also the petticoat (while Jonathan was having a cuppa).  He cleaned up the mini-heaps of sand that I had created when fitting and testing the sanding rod (there still being some sand in the sand boxes!).

Clive and Ade [Loco Dept] had an inspect of the tender insides.  Clive clambered in and reported that there was much grot on the floor - some white deposit and some flakes of paint; the front section was still wet; the lower half was in better condition than the upper half, which had lost much of its paint.


It was decided that the inside needs a coating of Deproma (anti-rust paint) and maybe some bitumen if time permits.  Gil tried to remove the "plug" in the bottom of the tender, and let out some more water, but couldn't get the plug out.

Sunday 22nd
Just time to paint the lettering on the 12 rail chairs, in preparation for the railway's opening on 7 March.

Tuesday 24th
David spent the entire day working on the brake rods.  Much of the intent was to maintain the strength in the ends of the rods, they having been drilled and bushed.  So, David was welding the bushes in place and also adding more weld to the outer edge of some that Bruce felt were a shade thinner than he'd like.


I spent the morning inside the tender tank. It has stood up to its 4-years of use quite well.  However, the paint on the inside had almost entirely flaked off!  The primer was still good, though.  The "ceiling" (i.e. the underside of the top plates) was well rusted.  In just one section of the tank, I wire-brushed sides & ceiling and then applied Deproma anti-rust paint to the rust patches.

Bruce popped in to see how we were getting on - and it was at this point that I learned about the "plug" not having been pulled.  With Bruce acting as gopher, I crawled under the tender, but it was impossible to safely remove the plug without the risk of it falling down and breaking my arm … so I didn't.  It's a bit heavier than your average bath plug.

Later I finished off the 12 boot scrapers and made more wooden wedges for future use. Finally, as David finished his welding, I painted the ends of his rods.

Wednesday 25th
Clive removed the "plug" from the bottom of the tender and then he and Howard [both of Loco dept] blasted the tender insides with the pressure hose.  Loads of grot came off (mostly paint).  The primer beneath is generally good.  There's no time to do anything else (e.g. paint or bitumen) so that will have to wait until end of season.  Clive refitted the plug and added some water to test its seal.

Gil, Dixie and [new] David worked all day on the brake rigging.  It transpired that they could not refit two of the rods without removing the brake shoes!  Bit of a bind.  All of the RHS is now done (rods & shoes all on) but there is one left to do: LHS rear rod.  It's end needs tweaking to make it fit the fork of the next rod.

John G continued with his ferrules - painting a couple (and accidentally painting the workbench top) and putting a cunning code on each one so that they can be fitted back into their correct holes next time !   … if you can work out the code.  :-)

Bruce assisted the brake gang during the morning but then persuaded John to help hoover out the boiler tubes.  On Saturday, Jonathan pushed a flue brush through the tubes and in doing so managed to block a couple of them.  The brush was a very tight fit, so it took soot off the tubes sides and pushed it down … but in a couple of cases built up the deposits sufficient to create a blockage.  So, Bruce & John blew through them all, which worked fine (apart from the one that really was blocked, whence Bruce got the blow-back!).

I was on Granddad duty in the morning and again at school home time.  As a result, all I achieved was fitting the vacuum gauge back in the cab and cleaning 4 rail chairs.  Not even time to paint their bottoms!

Carpo fitted the mud-hole doors, so we are nearly ready for steaming.  Here's the current plan:

Saturday = finish brakes and check the tender plug for leaks.  Probably fill the tender with coal & water.
Wednesday 4th = Light a warming fire.
Thurs 5th = carry out general testing (set steam valves to pressure, perhaps; check everything works)
Friday 6th = formal steam test.
Monday 9th = fit brick arch and light a warming fire.
Tues 10 - Fri 13 = light steam - in use as standby loco.
Sat & Sun = in service.


Roger

Wednesday, 18 February 2015

Maintenance Update (painting, regulator, sand, bolts)

Friday 13th
I managed to squeeze in a couple of hours to paint the buffer beams.  Friday is a good day, as there's hardly anyone about.  I was first there, and only saw 3 other people all morning.

Saturday 14th
Ray O'H is there taking photos of my painting drips for the GWSR Blog!  Later, he came along to borrow the bolts that attach our number plate to the cab side … to use on a photo shoot of 2874 (for which they now have a cabside plate)!

Loco Dept chaps (notably Clive, Ade & Ray) were working on the loco - mostly waxing and polishing the boiler barrel cladding; Clive tackled some peeling paint on the cab roof and applied primer.  He says he'll apply black paint on the roof for us on Wednesday.

Since fitting the new valves, there has been a noticeable shake in the reverser lever in the cab.  David took a look, and decided that the little locking piece that holds the reverser into "gear" is a tad worn and could do with being replaced with one of a tighter fit.  He's going to make a couple and case-harden them.

The regulator valves occupied several people for various parts of the day.  Gil & Bruce were lapping-in the surface of the valve in the smokebox.  David finished off lapping the valve pieces themselves.  Once inspected & approved by Carpo, the guys attempted to fit the valve together.  :-)

John started the day by fitting the Mason's valve (steam heating) in the cab.  For a while he was being General Assistant and cleaning things.  Then he started on rail chairs.  Unfortunately, the needle-gun was not behaving too well (at least 4 needles flew out of it, and it sounded quite poorly).  We did a swop with another gun and got him going again.  By end-of-play John had cleaned four chairs (one of which had been particularly filthy and took ages) and painted six bottoms.

I decided to have a butcher's at the RH rear sandbox, which appeared to permanently dribble sand.  I played with it all morning, taking the whole thing apart and trying to work out how sand could escape.  Finally, I discovered that the mechanism is past its sell-by date.  There's a central rod with a couple of channels in it, this rotates within a pipe that has two slots in it.  When the slots and channels are aligned, sand should trickle out.  But there is so much play between the rod and the pipe, that sand appears to be able to sneak in through the slot, around the rod and out of the channel even when the thing is supposed to be closed!  So, two options: Fabricate new mechanism; or use coarser sand!

Bruce began the day by tightening the blow-down valve (but yet again didn't get as far as working out the route for the exhaust pipe) before getting sucked into the regulator valve.

After lunch, I followed up issue 31 which says that there is excessive clearance between weighshaft* collar and bearing.  You may need a photo to understand that!  I measured the gap between collar and bearing on both side: LHS = 4mm; RHS = 1mm (sorry about using millimetres, but the gap was rather small!).  After looking for further clues and discussing it with Bruce & Gil, I soon found that the LHS collar securing bolt was not exactly tight .. so I tapped the collar outwards and tightened it up.

*According to the Black Book this seems to be called the "Reversing Shaft", but it was recorded in the issues log as a "weighshaft".


After that, I cleaned a couple of chairs before getting sucked into the veritable black hole of a regulator valve!  The guys had got it all back together, but would the face plate go on? [Rhetorical question]  For a while, I waggled the regulator handle while Gil & David waggled the face plate.  No joy.  Then I waggled the face plate and Gil waggled the regulator.  The problem was to get the boss on the face plate to engage with the regulator rod and six studs all at the same time!  David was struggling to insert a thin bar to raise the regulator rod to align it height-wise, but it would then slide sideways!  Finally, just before 5pm our luck was in - the rod engaged and four studs did too.  But the top ones were still being awkward.  With very careful adjustment of the face plate (so as not to lose the rod!) plus a few belts with the copper mallet, and everything began to go home [John had actually gone home] .  Washer and nuts on ...  Well, there was one minor embarrassment: I sent Bruce for four washers, but then David pointed out that four studs were better off without washers, so we rearranged the washers and had all of the nuts on by the time Bruce came back … with washers! Ooops! 5.15 pm: time to go home.


While we were all playing in the smokebox, Maurice had nipped out and carried off the apple core that I'd left him.  In fact, I could hear him munching on it, and so stayed behind, hoping to get a photo of him; but three times he poked his nose out, saw me there, and went back inside again!

Monday 16th
Just popped down to apply a coat of varnish to the bell and number plate … and feed Maurice.

Wednesday 18th
Stuart had come down all the way from Lancashire, just to clean and touch-up the lettering on the tender and the number on the front buffer beam.


David took another look at the reverser lever catch, to measure the little plunger ready to make new one(s).  Most of the day, however, he was welding in bushes on the brake rods.  There are four more to go!  Towards the end of the day he helped with the petticoat, which was refusing to go home …

… Mike had given the petticoat a clean with chisel and wire brush.  However, when Gil, Bruce & I attempted to slide it back onto the bottom of the blower ring (beneath the chimney) we could not get the bolts to fit through the securing holes.  The holes would not line up!  What we discovered was that there was so much grot on the blower ring's bottom, that we had to chisel it off.  It shone as though it was metal, but it was just fooling us!  "Fool's steel", I suppose.  Anyway, Bruce & I tackled the ring and David took the petticoat off and ground off an obstinate piece on that, that Mike had been unable to get off.

As a certain person had bought the wrong sized bolts, we could only temporarily fit the petticoat back in place - using three bolts that do fit.  After cleaning up the surfaces we could only find two of these bolts … we searched all over inside the smokebox … on the running board below the smokebox … guess where I found it ….


Apart from time spent in the smokebox, Gil also gave the cab roof some attention.  There were a few spots where rust had regained control, so he tidied these up and applied a primer coat.  Having practiced at painting, he then applied the same black to the brake rods that David had been working on.

John G pressed on with the ferrules in the cab - fitting the last one and then painting some of them.  As they have been adjusted to fit each position, they'll need carefully marking as to which hole they fit.  Once you get painting, you can't stop … and John painted the bottle screw sections of the brake rigging.  Then he painted the foot pads on top of the buffers in black!


I cleaned the injectors, and Bruce decided that they need their clack valves lapping, so they didn't get fitted.  I also fitted the newly cleaned, painted and varnished LHS cab number plate, ably assisted by John (who happened to be in the cab playing with his ferrules at the time).

On Saturday we aim to be over the pit, so that we can finish off a few jobs and make a start on fitting the brake rigging.

Maurice doesn't like cucumber.


Roger

Wednesday, 11 February 2015

Maintenance Update (regulator, lapping, ferrules)

Saturday 7th
Maurice, having ably mastered the game of 'hide the food bowl' (i.e. neither I, Bruce or John could find it last Wednesday), is ready for his next challenge on the route to the 2016 Mouse Olympics.  I stumbled upon the food bowl today, hidden underneath the pallets upon which we paint the rail chairs!  So, this week's challenge is to get the food bowl out of the  steel "pen" that I have now put down to surround the food and water bowls.  Will he use brute force, or with there be a ramp with six pencils used as rollers?  We shall see …

Meanwhile, Gilbert has hatched a cunning plan: Anyone who records an issue against 2807 has to come and fix it themselves!  Accordingly, Andy W spent the day in the smokebox, removing the regulator valve.  Actually, I suspect he was just showing off: He managed to get 13 nuts & bolts out in a day, dramatically beating our record of six last Wednesday!

Gil was assisting Andy.  He made a new gasket for the face plate, and cleaned the threads on the bolts and studs ready for re-assembly.

Bruce was going to fashion a (thick) wire to plan a route for the blow-down valve's exhaust pipe.  He only got as far as finding and straightening a length of suitable wire before deciding that the new regulator valve needed to be lapped-in before it could be fitted, and this was a higher priority.  So, he spent all afternoon carefully lapping the two plates of the valve.

John began with his usual role of gopher, but then he and I decided that we were surplus to requirement and could therefore restart the boot-scraper production line.  John nobly cut off stubborn bolts and congealed grease, while I manned the needle gun and wire brush.  Early on, the needle gun kept freezing up - as the compressed air expanded it cooled, and the ambient temperature being circa 0.5 degrees Celsius (33 in old money) the vapour in the air froze!  I took time out at that point to fit a new element in our heater.  Bruce (working at the bench doing his lapping) was most appreciative.  Also, Andy presented me with the newly-removed regulator valve face plate with a request to wire-brush all of the old gasket off.

By end of day, we all felt we'd achieved something … eight black bottoms (on rail chairs) in my case.

Sunday 8th
I called in at Todders, and to my surprise Bruce was already there!  He had figured that in order to lap-in the main regulator valve on Wednesday, he ought to make sure the new valve part had a perfectly flat bottom.  It hadn't (of course) and so Bruce was lapping its bottom in anticipation.

I took the opportunity to replace needles in the needle-gun, since it had lost about 7 of the 19 that it began life with.

Monday 9th
I suddenly remembered that I have an order for a 1900 MR boot scraper - and I couldn't remember cleaning one on Saturday.  So, I went down to check … we hadn't.  So, I tested the needle gun and wire brush on the MR chair, and painted its bottom.  Also undercoated the top of a BR chair black, as we have an order for a black BR boot scraper.

Tuesday 10th
I had to go and apply black enamel to the BR boot scraper for collection on Wednesday!

Wednesday 11th
Bruce was lapping all day.  It's a tight hole inside the regulator box in the smokebox, and Bruce had to convert a bolt into a knob to fit on the top of the lapping plate to be able to manipulate it.  There is not much room for movement, so it was a slow process.  By end of day, the worst was probably done … need to use fine paste for the next stage on Saturday.

Carpo had supplied new ferrules to replace those that he "borrowed" from us for his 42xx last year.  John G then played with them to make them fit into the existing holes in our backhead cladding.  In the photo, you can see two of the new (shiny!) ferrules; you can also see how the regulator handle was released and rotated to get the actuator out of the way at the other end for Bruce to do his lapping.


Clive & Ade [Loco Dept] were cleaning the boiler cladding (causing the occasional shower in the cab, apparently).  They will apply wax next time.

When asked what he'd been doing, Gil replied: "General assistance."  He did release the regulator handle, though!

Tim P [Loco Dept] popped into the TPO to take a look at the new regulator valve.  This is something that most people never see, so it is of interest when one is exposed.  John P [Loco Dept] took part in the 'cram as many people as possible in the smokebox' record attempt, similarly to see how it all works.

I spent the day in the TPO on boot scrapers: picked out the lettering on the black one (paint was almost dry when John M collected it) and fitted the brush. Then I applied crimson lake to two ordered chairs; undercoated 6 in green; plus 9 brushes sanded and stained.

Stu's coming down from Lancashire next week to touch up the lettering on the tender and the numbers on the front buffer beam.

BTW 2807 is not scheduled to operate the race trains in March.


Roger

Wednesday, 4 February 2015

Maintenance Update (rod, spring, sand, bracket, petticoat)

Thursday 29th
I popped down to feed Maurice.  Cheeky blighter had opened the First Aid kit and taken out a triangular bandage.  No idea why - maybe he'd hurt his foot, or something?  Or would it have made a nice duvet for him?  Who knows!

Saturday 31st
Bruce reports:-
The day started cold with a light sprinkling of snow.

David removed the rod which links the two rear sand boxes. The rod runs right across the loco under the cab floor and David  had modified the shape to give clearance for the pipe from the new blowdown valve, as reported in Roger's report last week. Unfortunately when the sand lever was moved to start sanding, the rod jammed against the end of the slot in the frames so it needed yet another joggle put into it to give clearance. Meanwhile Alistair was cutting a piece of reinforcing metal for David to weld along one edge to allow the other edge to be cut away.

Gilbert and Brian finished fitting the right leading spring, they then moved to the other side to determine whether the spring compensator between the leading and intermediate springs was seized.

We were concerned that the springs on the front end of the loco seem to be out of balance and it was felt that the above mentioned compensator could be the cause.

A jack was inserted under the compensator and to our amazement it moved quite easily, so back to the drawing board.

Gilbert, Brian and Bruce then consulted Carpo, who suggested that we measured the length and depth of each spring and compare them to see if we had a weak spring, they all seemed OK.

After more head scratching we started to adjust springs to observe what effect this would have and slowly we managed to get the balance much better and good enough to run.

Mark then towed the loco down to the headshunt and back to settle the springs down, after inspection they were deemed to be acceptable, phew!

To finish the job we need to check all the axle weights again, but not until the boiler is full.

By this time David had finished the sand box rod and Alistair fitted it, we thought it would be a good idea to test it.  When the engine returned from the North York's Moors Railway the left sandbox was full and the right one almost empty, so some sand was transferred across and lever pulled.

Success, the sand ran out of both pipes, 'OK turn it off', the sand stopped on the left side, but !!!!!!! it carried on trickling from the right side, no wonder it was empty.

So there is yet another job to put on the list.

David also cut the drooping tender lamp bracket and re-welded it straight.  It is painted ready for fitting.

Wednesday 4th February
Bruce started the day in his usual lofty position - atop the boiler.  He lapped and fitted the top clacks.

John fitted the lamp bracket to the back of the tender.  He was later told by Clive that the vacuum 'bag' was difficult to release, and could we adjust the angle of the dummy (onto which it clamps when not in use)?  I suggested to John that simply moving the dummy down would relieve the force needed to persuade the vacuum pipe to clamp onto its dummy [an image of my grandson flew into my mind then … sorry!].  So, John removed the bracket that retains the vertical pipe; slid the dummy bracket down, and tightened it all up again.  Success!


Clive, by the way, was on the top of the tender applying a coat of bitumen to the back section at the time.

Gilbert had decided that, as progress had been good, we could afford to spend time replacing the regulator valve.  We have a minor design deficiency in the one we initially made, such that the small valve that should open first before the main valve … doesn't.  We've had a new valve made.  The only way to get at the regulator valve (which is inside the smokebox) is to remove the 'petticoat' that is attached to the bottom of the blower ring, which is attached to the bottom of the chimney [see diagram].

Gilbert spent the entire day on removing the petticoat; I spent 9/10th of the day working on it, too!  All we had to do was to remove the six retaining bolts from the petticoat, and hey presto!   :-)

They would not undo.  They refused to budge.  Plan B was to cut their nuts off and bash the bolts through.  In the confined space of the smokebox, with various pipes in the way, this proved to be a struggle.  Nevertheless, we managed to cut off the nuts … and bash out four of the six bolts!  The two towards the rear were difficult to apply force to.  Plan C was to cut off their heads, on the principle that there is more space inside the petticoat than behind it, and hence bash them out 'backwards'.  OK, so their heads rolled.  But would they bash out?

Plan D was to drill the beggars out!  By now, we had Bruce in the smokebox with me [we seem to be getting a bit familiar inside various bits of 2807!] and John being gopher.  Two drills and four drill bits later, we finally persuaded the old bolt remnants to part company, and the petticoat to come off.  By this time it was past 4pm, so we decided to pack away and leave the regulator valve for another day.  Six bolts ….  :-(


Oh, Maurice: the game of hide & seek with his food bowl is getting a bit ridiculous!  We all had a search, but to no avail.  He's won today's game!


Roger

Wednesday, 28 January 2015

Maintenance Update (damper, spring, tubes, charter)

Friday 23rd
Popped down to spread a morsel of paint on the LHS number plate while no one else was around to create a dust or stick their blue latex glove to it.  ;-))

Saturday 24th
Gil & I examined the front damper linkage, which allegedly sticks open (or did once!).  There is nothing visible that prevents the damper from closing or the operating lever from working.  I did lengthen the operating rod by 1/2" which might make it easier to use (from the cab).

John finished off the fitting of the con rods by inserting split pins into the gudgeon pins.  We hadn't got any suitable split pins last Wednesday.  Then he tackled another issue on the list of complaints - that the centre lower lamp bracket on the tender is pointing downwards.  Yes it is - by about a ten degree angle.  I can't help but feel that the statement that 'you have to be standing in the pit to see if the lamp is lit' might be a slight exaggeration.

David pressed on with his sanding lever by-pass (much welding and adjusting to get the bypass in the right spot).


Gil & I then moved on to the front springs that appear to be out of alignment.  It is difficult to know where to jack the loco up to relieve the pressure on the spring (because of the line of inter-connected leaf springs!).  However, what I did spot was that the leaves in the front RHS spring have moved (left) horizontally in their clasp [see photo].  This should not be possible!  I believe that there is a pin running vertically through the centres of the leaves, but hidden from view by the clasp.   Is it missing?  Has it sheared off?


Lunch called.

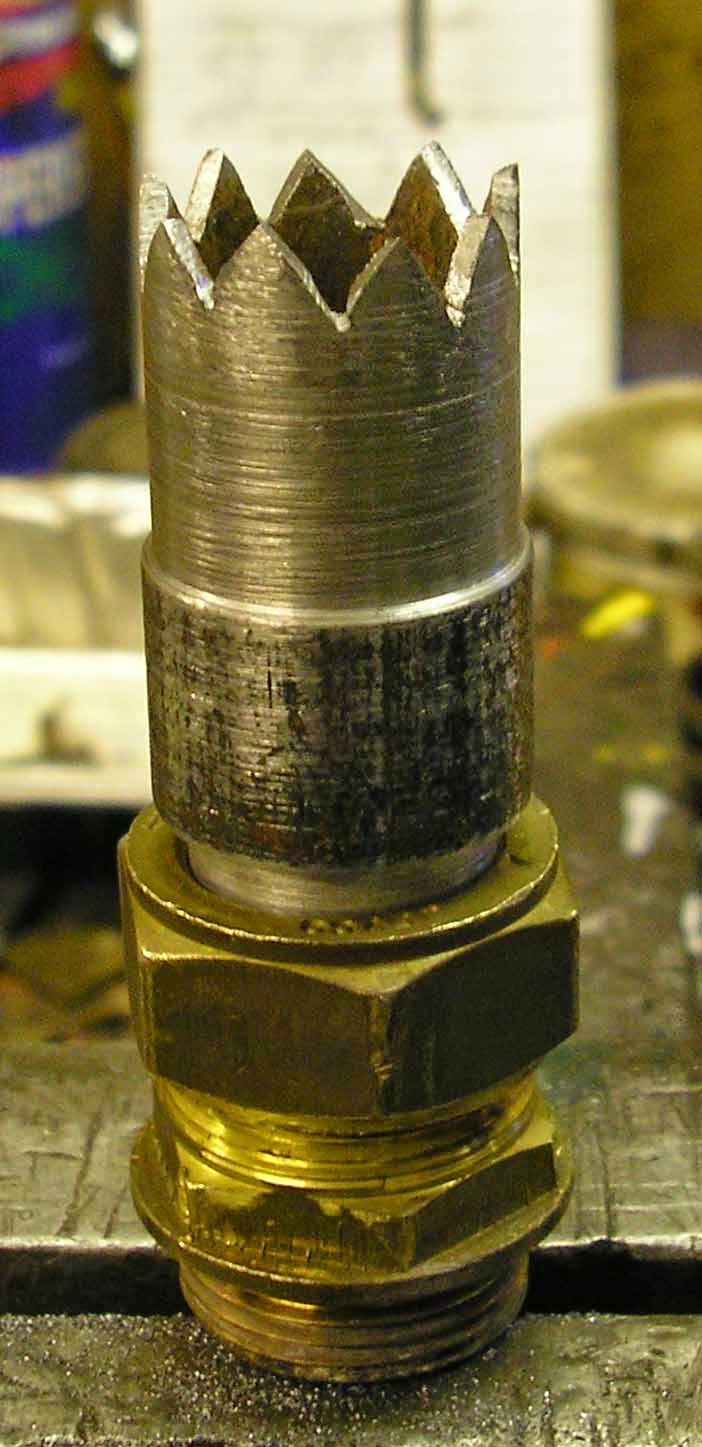
During the week, Bruce had bought four 1.5 metre lengths of 22mm copper pipe to use for clearing blocked boiler tubes.  You use them a bit like a chimney sweep's brush, fixing another on as you need one to push further into the tube.  So, the cutter (photo last time) goes on the end on the first pipe, which is then inserted into the tube from within the firebox.  To the other end of the copper pipe is attached the hoover!  This sucks muck out of the blocked tube (you can hear it rattling along the pipe) as you push it further in.  If you can't clear the blockage with one length of pipe, you add another … and so on.  Experience showed that this works beautifully (most of the time).  If the cutter gets jammed with a large piece of clinker (which it did several times) you can either blow down the pipe (by mouth or hoover) or withdraw the pipe and unblock it by hand.  You can tell when the tube is blocked and when it becomes free by the sound of the air being sucked into the tube.  It did require Bruce to be in the firebox with me, and John was operating the hoover outside (David took over when John had to leave).  In fact, much of the dust was so fine that it blew through the filter in the hoover, and  there was a liberal layer of fine ash all over the cab (and John) when we'd finished!  Nevertheless, the scheme worked, and all of the tubes are now clear.  The dustbin between Roads 6 & 5 is, however, literally half-full of ash!  [Thanks go to Ray O'Hara for the photos]


Meanwhile, we could hear much bashing at the front end.  Despite Gil having the assistance of Andy Webber [Loco Dept] and Mike, they only managed to free one end of the spring.  There's a large split pin in the compensating arm (attached to the rear of this spring) that absolutely refuses to come out, apparently.  So, at 5 pm they gave up.

Sunday 25th
I painted David's by-pass.  Looked at the spring.  Couldn't see what the problem was - just pull out two split pins and the spring will drop off .. in fact, just remove the one in the middle hanger and it should drop off !

Monday 26th
I had a couple of hours spare, so popped down to take a look at the spring that was causing so much hassle.  The front part had been disconnected.  The split pin in the rear was refusing to budge.  The centre pin was in place.  So, I removed the centre pin, dropped the spring, and swung it round to gain better access to the errant rear split pin.  Yes, it did not want to come out!  So, I hacked it off.  I could then bash it out, whereupon the whole spring dropped.

A spring is a 3-man lift (minimum), so I was tempted to just leave it where it was (on top of some boards across the pit).  However, a couple of helpful chaps lent a hand … to no avail!  One of them had a broken wrist, so we weren't entirely a 3-man team!  They toddled off, spring still on the boards.  Meanwhile, I figured that the spring could be tipped on its side & persuaded to be slid out sideways ahead of the wheel onto the concrete apron … which I managed to do.  Mark Y [Loco Dept] passed by and lent a hand to put the spring on a trolley and wheel it off for refurbishment.  The new spring was relatively easy to slide back under the loco and onto the planks, more-or-less in position for fitting.  However, I ran out of spare time and left it for Wednesday.


Tuesday 27th
News from Brian:
"Not heard officially from the GWSR but 2807 is booked for a photo charter on Monday 16th March. She will have worked the race trains from 10-13 March so will need good clean on weekend 14-15 March"

Wednesday 28th
I couldn't get to Todders before noon, so the morning report is a bit sketchy.  I gather that Gil led the entire team in attempting to fit the spring.  Today's team (at that point) consisted of Gil, Bruce, John T and new recruit John H.  Whilst they had managed to fit the front and the back, they were unable to raise the centre of the spring high enough to fit the retaining pin.

Bruce gave me a hand in preparing to enter the Cave of Doom, once more: the new brick arch had arrived, so I needed to tidy up the remaining fire cement that was stuck around the firebox sides.  It is used to fill in the spaces between bricks and firebox walls … and it was not keen on coming off!

Lunch called.  Gil and/or Bruce sought advice from Loco Dept chaps, who said that they way to fit the spring was to fit the centre retaining pin first!

After lunch, I continued to chisel away at the cement, and once that was off, I slapped some heat-resistant paint on the stay ends in the area of the brick arch.

Mike arrived at lunch time, and got the task of fitting David's sanding lever rod (the one with the by-pass).

Bruce fitted the GWR-style blow-down valve, so that we can now see exactly where the exhaust pipe has to go (it was the reason for the by-pass).  While doing so, we noticed that two damper rods had become crossed-over!  We fixed that, which enabled me to then test if I had successfully fixed the issue of the front damper sometimes sticking open.  … Not to my satisfaction, I hadn't!

Back in the pit, the spring team had now removed the connections at each end of the spring; raised the spring to the necessary height, and fitted the centre pin.  When the front end was connected, they couldn't raise the rear end to connect it.  After some discussion of the possible options, Bruce said, 'Why not undo the nut on the other end of the compensating beam (that links this spring to the adjacent one), which will lower that end of the beam and raise the front end?'  We did.  It worked.  However, it was now past 5 pm and both Johns had gone home.  Bruce had to leave, too, so work was suspended.  So, once again, the spring has been left for another day.

Family commitments will keep me away from Todders until next Wednesday, so I shall rely upon Bruce to keep us all informed of progress on Saturday!


Roger

Wednesday, 21 January 2015

Maintenance Update (rods, tubes, cylinders,

Thursday 15th
Yesterday, the gang asked me to get: some pop-rivets; some marker pens; and barrier cream.  So, I investigated over the internet and planned a strategy: Get them from Halfords.  Well, Halfords didn't have the barrier cream in stock; didn't have the marker pens in stock; and the pop-rivets were not big enough!  I came out with a scraper for Eleanor's car.  Tried Buck & Hickman: they do sell the rivets, but don't keep them in stock.  Tried Toolstation: yes, got the rivets; yes, got the maker pens; no, don't sell barrier cream - try the chemist!  Tried the chemist - no, they don't have barrier cream!  Back to the internet - just bought one tub and got a second free.

In anticipation of not being able to go on Saturday, I went to Todders to deliver the rivets & pens. Thought I'd apply the primer coat to the five chairs that I prepared earlier in the week.  As it was 5.30 by the time I'd finished, I thought Maurice might pop out and say hello - but he didn't.  By the way, just look at the challenge that I'm about to set him …

http://www.youtube.com/

Saturday 17th
The morning began with the game of 'Hunt Maurice's Food Bowl'.  He appears to have dragged it round the radiator and across the floor towards his door.  Clever little chap - obviously figured it is more sensible to take the whole bowl home rather than run back & forth carrying one piece of food at a time!

It turned out to be a busy day.  While much chatting took place (discussing a multitude of options to achieve a few simple (!) tasks) John T snook out and re-riveted the top corner cladding pieces in the cab.  That's one issue crossed off.

Gil brought a flange, made for the exhaust pipe from the blowdown valve.  We all marvelled at the fact that it had been water-cut.


The pressure gauges (steam + heating) had been calibrated, so I was able to refit those in the cab.

Being in the cab, I moved on to solving the problem of the blow-down valve exhaust pipe being directly above (4" above) the lever that connects the sand boxes either side at the rear.  Much measuring ensued, followed by much debate (by most members of the team!).  The final solution is to weld on a by-pass such that the exhaust pipe can go straight down, and the sanding lever is moved forwards by 1.5".

David was tackling the brake rods (wherein the holes need moving),  After an hour and nine welding rods, he decided that this was not the way to do it!  He figured that it is more sensible to bush the existing holes and offset new holes accordingly (I assume the existing holes have to be opened out a tad, to do this).  So, after much further discussion and measurement, Gil has gone away with instructions for his local engineer to fix them!

Most of the day, Bruce was back on top of the boiler, lapping and fitting the safety valves.  I did see him, later, sitting in the smokebox.  I thought he was probably just keeping out of the way, but no - he was measuring the diameter of the boiler tubes!  There are about a dozen of these tubes blocked with ash.  After many days of discussion and various ideas about how to clear them without the operator getting soaked or blasted with grit, we seem to have agreed on using  a 3-segment copper pipe with a cutter on the end, and testing it with a vacuum cleaner first (to suck out loose dirt), and if that doesn't work, then it will have to be an air lance (and blast it out)!

Gil & John T removed the RHS front cylinder cover in order to measure the wear between piston head and cylinder wall.  I gather this was acceptable.  The cover was refitted.


Then Gil wanted to remove the RHS con rod to measure wear in its big end & small end bearing surfaces.  To get the con rod off requires it to be as far back as possible (MY fired up a shunter and moved us forwards a tad); the vacuum pump to be disconnected; the cross-head to be disconnected; and the piston to be manually pushed right to the front of the cylinder!  I assisted Gil & John in doing that.

Being in the mood for welding, David then began to cut metal and form a by-pass in the sanding lever actuation rod that is in the way of the exhaust from the blow-down valve.  Just a "wiggle" to permit a vertical down pipe.  Time ran out before he could finish, though.


By 4.10 pm, Gil had finished measuring his big end, and was quite keen on us taking off all of the coupling rods to measure.  Blow that for a game of soldiers!  Bruce, David & I badgered him into submission, and David & I fitted the con rod back on!

In a spare half-hour, I managed to apply a top coat to the five rail chairs.  Which reminds me, I have received a wonderful book for Christmas from my eldest son:

The Railway by Andrew Dow - and it means the rail-way (i.e. Permanent Way).  Subtitled: British Track Since 1804.  Well worth a read if you are a p-way buff.

Sunday 18th
Maurice had moved his bowl to right outside his door, again!  I'd popped down just to paint the lettering on the five chairs, and prepare ten brush heads (sand + stain).

Monday 19th
Todders is a veritable wild life preserve.  There's a robin that lives much of its time in the loco shed; there's a wagtail chirping away as it flits from wagon roof to wagon roof; and the magpie that frequently pops into P&O's van to see if there is anything shiny that it can lift!

I just went down to finish off the five boot scrapers, as I am being pressed by a customer!

Wednesday 21st
Close by Maurice's door there is an outside door - a hole with the mains electricity cable passing through.  Maurice is obviously noticing a draft (or the cold air), as he has started blocking it with bits of polystyrene!

Two main activities today: con rod & grate.  John T went on a safari hunt for split pins to finish off securing the RHS con rod.  No 6 mm ones to be found anywhere!  John then assisted Gil et al. in removing the LHS con rod, and subsequently fitting back after Gil had measured the bearings.


During the morning, John G and I fitted the grate back, and then I was able to peer along tubes to see if they were blocked, while John was in the smokebox with the lamp.  There are 14 that are blocked.  Other have some ash in them.


Bruce offered a range of options for getting them unblocked, and we are going for a 22 mm hollow rod with a cutter at one end and a hoover at the other.  Let's see how that works.  Bruce then made the cutter in anticipation.


Gil & Mike tightened up the cylinder cover nuts.  John T and I began cleaning the tender buffer beam, because it could do with a lick of paint.  I was then interrupted by a (welcome) delivery of close to 100 rail chairs from P.Way.

Having got into the swing of it, John then cleaned the Mason's valve while I cleaned the LHS number plate and the warning bell from the cab.


Carpo just managed to sneak in to the TPO for a biscuit before lights out!


Roger

Wednesday, 14 January 2015

Maintenance Update (brakes, washout, inspection)

Thursday 8th
As promised, I popped down and slapped a second coat on the bits that I painted on Wednesday (apart from the water scoop handle, which got its first coat - again!).  Also painted the spark arrester with heat-resistant aluminium paint.

Saturday 10th
The morning was extremely busy, and after lunch 2807 was pulled out over a pit where the boiler wash-out took place.

John T started the day by cleaning out the holes on the spark arrester mesh (that I had filled with silver paint!) before acting as gopher for me in the cab; also examined the angle around the firebox cladding in the cab, where the fixing rivets have disintegrated.

But the day began for me with clearing out the brick arch debris.  I was inside the firebox throwing lumps out to Gilbert in the cab; Gil was then passing them down to John, who was stacking the sizeable lumps neatly at the side of the shed.

Later, John cleaned the threads on all of the boiler plugs and cleaned the mudhole doors.  Even later, he assisted David & Bruce, measuring the lengths between brake blocks.

Bruce cleaned up the nuts & bolts that fix the spark arrested, before moving on to the brakes.  David & Bruce spent most of the day measuring the distances between brake blocks and the corresponding holes in the rods that link them, and figuring out what to do to move the holes into their correct positions.

Gil & Brian applied some air to the lubrication pipe from cab to cylinders to ensure it is not blocked, and removed the atomisers to clean them, too.

I spent most of the day inside the firebox cleaning the rivet heads around the foundation ring, and the nuts on the end of stays inside there.  Pretty filthy work.  Determined not to be prevented from continuing after lunch, I surreptitiously blocked the two holes in the firebox crown (i.e. put the fusible plugs back in!) to avoid me getting soaked while the Loco Dept chaps performed the wash-out.  However, once they got into the cab to squirt water into the plugs and doors there, I figured that wisdom prevailed, and got out!

I think that Gil assisted with the washout.  Certainly Steve was manning the water pump, with a chain of command between him and the chap at the sharp end of the hose.


Steve had earlier examined that angle in the cab and decided that, as it is impossible to get to the rear of these pieces (i.e. for a nut), they will have to be re-riveted.

I took the LHS number plate off and the bell from the cab, because the lacquer on these was wearing out, so they needed cleaning up.

Gil & Brian later met with the railway to discuss various things.  We were unable to have our Supporters' Special even close to when we wanted it.  So, Supporters Day will be Monday 18th May.

Sunday 11th
Maurice had had a hooley during the night!  The towels, tea-towels and flannels were all on the floor!  It looked like the aftermath of a great party!

Having started in the firebox on Saturday, I decided to finish the job.  The boiler inspector is coming on Wednesday, so it needs to be clean for his inspection.  After helping me look for the power cable and wire brush that were not where they should have been, (Brian discovered them on the flat wagon outside!)  he abandoned me; so I pressed on inside the firebox.

After lunch, I slapped varnish-remover onto the brassware (bell & number plate) and persuaded the old varnish to depart.

Tuesday 13th
In the transition period between sleep and awake, by brain remembered that today is the day that the Flag & Whistle is re-opening … which means that I need some boot scrapers.  So, I toddled off to Todders and cleaned up five rail chairs during the morning.  While I was attending to their bottoms, I thought I could hear … yes, it's raining!

Wednesday 14th
The boiler inspector came and … well, inspected the boiler!  He said that it was in generally good condition.  There are five stays and a patch screw to keep an eye on, but if there's no change next year, then that's OK.  When he'd finished inside the firebox, I was able to clamber in and apply heat-resisting paint to the stay nuts and rivet heads that are on the foundation ring and are at burning-coal level.  That took all afternoon.

While waiting for him, I had checked that the new blow-down valve did actually fit on its studs .. it did.  Bruce & I then chewed over how to fit the pipe to the bottom of the valve to exhaust steam vertically downwards, when there's a sander operating lever four inches directly below it!

Bruce spent most of the day sitting on top of the boiler, lapping-in the clack valves and the safety valves.

Gil removed one cylinder cover in order to measure the insides and check the gap around the piston head.  It is allowed to be a quarter inch, whereafter a new piston head has to be procured.

John T and also John G were assisting Gil - removing cladding to get at the cylinder cover, and then helping remove the cover.  Later, John G cleaned up the two metal poles that sit either side inside the firebox acting as supports for the sides of the brick arch.  They are interesting shapes!  That's because they rest on studs on each side, and have to fit the shape of the sides.

Clive (possibly with the help of others) applied a second coat of bitumen to the tender coal space.  We discussed getting inside the tender in order to apply a coat of bitumen on the inside.  Clive seems quite keen on finding some poor soul to do this!  It's a tad claustrophobic in there; but at least we now have a fresh-air sucker/blower, so they won't have to sit in the fumes (as I did, some six years ago).

Oh, I almost forgot - I applied a file to the leading damper lever to make it less of a struggle for the poor fireman to close the damper door!  That was issue 44 sorted!


Roger

Wednesday, 7 January 2015

Maintenance Update (hangers, blowdown, washout)

Final recorded issue:
50 [NJC] Puff of steam from air valve when ejector turned on. Steam leak on back of cone?

Saturday 3rd January 2015
The postman brought a package this morning addressed to: "Maurice, c/o R.Molesworth, Hydaway Cottage ….".  Inside was a Happy New Year card from Muriel Mouse, resident with Ken & Liz Always-Jones!  Wasn't that nice?  Even nicer was the bag of Harry Hamster Treats.  I'm sure that Maurice doesn't know where Dorridge is, otherwise he'd be off … and who knows what that might lead to !!!

It was not the sunniest of days.  In fact, it drizzled most of the day.  2807 was pulled out over the pit (to take full advantage of the rain).  And as it was not wet enough in the pit beneath 2807, Bruce opened the blow-down valve to drain the boiler.   Gil, Bruce, John & I  started on removing the brake blocks and fitting the new ones.  I would guess that a brake block weighs at least 56 pounds (25 kilos).  It has to slide up around the rim of the wheel and into the hanger.  Then the holes in hanger and shoe have to be aligned; a pin then passes through, front-to-back; and finally an R-clip is inserted into a hole through the pin, at the back of the hanger.


It was a filthy task.  A struggle to get the shoe in place.  A challenge to align the holes.  A veritable test of one's dexterity to fit the R-clip.  To be honest, we'd got all of the old shoes off but only two new ones on by lunchtime!  Then we were given a deadline: Loco Dept wanted to move 2807 at 3.30pm.  We didn't panic.  We supped our tea and munched our sarnies.  Then (mostly) John & I attacked the remaining six brakes with vigour (and experience!).  The fourth one (front right) was particularly difficult, as once the shoe was in place, the pin would not go into its hole - there wasn't enough room; it was fouled by the main cylinder rear gland housing.  After some metaphorical head-scratching (hands too gunged up to actually scratch anything) Clive joined in and suggested removing the shoe and partially inserting the pin before sliding the shoe back up.  Then we faced the puzzle of aligning the holes (that could not be seen with the pin in the hole, obviously).  I was on lever; John on fulcrum & wood block packing exchange; Clive waggling the pin; and Bruce with his finger in the hole, behind the hanger!  We did it - but it was already nearly 3.30.  Steve O backed up with the diseasel shunter, and pushed 2807 back a few yards - this was so the fork-lift could get at the tender, because we had two spare springs on there from when she went to NYMR.  While they were removing the springs, Steve O & I fitted the final shoe in a matter of moments!

John & Bruce tidied away and cleaned the disgustingly filthy spanners.  Steve, Gil & I shunted 2807 round to Road 6 and back into the shed.

I should also thank several people from Loco Dept who, while we were braking, cleaned out the tender, and removed gauge frame and Mason's valve … but I was too busy to see who they were (sorry!).  Clive says it included: Steve O, Sean, Ade S, Jamie, "and even Chris Irving threw in a hand."

The next challenge is to measure the required length of brake rigging.  There is a bottle-screw adjuster at the end, but no adjustment between the brake blocks at all.  So, you've got to measure it and get the holes (in the rods) in the right place!  … and as Bruce pointed out, there's also a need to account for play in the pins that hold sections of rod together!


Sunday 4th
Maurice had tipped his food bowl over in his excitement to eat the Hamster Treats!  It landed on top of the rest of the food, and he obviously then pushed it around the floor trying in vain to tip it back again.  Needless to say, the food remained hidden beneath the bowl.  Aaaah!

Monday 5th
I removed the three gauges from the cab and left them with Carpo to be tested.  Then I decided to remove the blow-down valve.  By 2.35 pm, I had given up!  I had disconnected the pipe from the valve and managed to persuade two of the four retaining nuts to come off.  However, the third resisted strongly, and the fourth is difficult to get at.  Pausing from belting no.3 nut, I removed one floor panel (this is how to get at no.4 nut) and tried to remove panel two.  You can only lift it up after removing the three handles from the damper levers … which I did.  Then, one bolt on the floor panel seized, didn't it!  Could I get a spanner on its underside?  [Rhetorical question]  No, because the damper levers are in the way.  Briefly attempted a metal saw on the bolt head, but decided that that was fruitless, and a thin cutter in the angle grinder was the only hope.  Where's the 110 volt supply?  Through the DMU (literally - in one door and out the other).

Went home instead !!!

Tuesday 6th
Arrived at Todders at 09.40 determined to complete the job of removing the blowdown valve.  I attacked the recalcitrant bolt and soon decapitated it and removed the floor plate.  As you can see from the photo, the first two nuts retaining the valve were easily accessible and didn't object strongly to being removed.  However, nut-3 put up one heck of a struggle!  I had to employ a long lever on a stilson and whack it with a mallet.  It took quite a while to persuade it to budge at all, and then I could only turn it half-a-face at a time!  I was having to alternate between the stilson and a ring spanner, to gain purchase.  I adjourned for coffee at 11.15, but then returned with renewed vigour!


Then getting a spanner on nut-4 was a tease, and turning it was only achieved by resting a long pipe on the end of the spanner and applying science (i.e. a mallet) to it.  By 12 noon these last two nuts had surrendered.  A grand total of two nuts and a bolt had taken about two hours!

Wednesday 7th
In readiness for the boiler wash-out, which is scheduled for Saturday, Gilbert used his strong-arm tactics to ease out all of the boiler plugs and mudhole doors (well, apart from four on the top of the boiler, which he didn't feel safe doing).  Towards the end of the afternoon, he smashed the brick arch to pieces.  I'm not sure what got into him today!

Bruce began in the smokebox, removing the spark arrester.  While in there, he checked the jumper ring on the blast pipe.  A couple of bolts on the retaining clips are loose, but so seized up that he couldn't undo them nor do them up.  So, they're not coming off on their own!  Apart from that, the jumper works fine.  After lunch Bruce clambered on top of the boiler and removed the brass bonnet; then he removed the clack valves and also the safety valves.

I delivered a boot scraper to Sue in Prescott before reaching Todders.  I was then tidying up my previous work - cleaning the threads on the studs & nuts for replacing the blowdown valve; ditto for the floor panels that I'd had to remove.  Yesterday I had removed the bridge from the mudhole door at the side of the blowdown valve in order to get at the latter's nuts.  Today I removed the door - which was only possible after stripping the seal from round its edge.

Later I followed up two issues:
one regarding a catch on the regulator that is designed to hold it slightly open (whereby it opens the W-valve to let lubrication into the cylinders); a driver had reported it to be too stiff. It works absolutely fine, and I can only put the complaint down to driver fatigue.
The front damper lever seems to present a challenge to lift, either to open the damper or to close the damper.  This almost certainly results from the modification recently done to the damper door.  Loco needs to be over a pit to verify the cause before applying a file to the lever.

Loco Dept chaps (Clive, Ben, Pete and Peter G) spread bitumen all over the tender coal space (and tool boxes, and front panels …).  They did offer to slap it on the handbrake and injector water cocks too, but I declined their offer.  Instead, I applied a coat of paint to the water scoop handle, handbrake and water cocks.  Unfortunately, Gilbert wiped it off the water scoop handle shortly afterwards!  I know it was him, because there was a piece of blue latex glove stuck to what paint remained, and only Gilbert uses blue latex gloves!

John G joined us and acted as Gopher to Gil for the day.  Mike came for the afternoon and cleaned out the smokebox to make life more pleasant for Gil to remove the plugs therein; and then cleaned the gunk off the spark arrester ready for it to be painted.

Fred & Ray were working on the siphon van at Winchcombe.

Thursday 8th
I'll go and repaint the water scoop handle!


Roger